Thule 916XTR T2 Bike Rack Assembly Instruction Guide
After a decade of service I decided to retire my Yakima Rimroc 3 hitch mounted bike rack and purchase a Thule 916XTR T2 Hitch Rack from Amazon. In advance of taking delivery I downloaded the Thule 916XTR T2 assembly and installation manual. Pretty quickly I developed a few questions about the assembly process so I hit the internet for clues. What I found was more users like myself with similar questions regarding the Thule 916XTR T2 Bike Rack Assembly Instructions. There was enough that I decided it might be worthwhile to commit the process to this site to help others. Now having been through the process once I am 100 percent positive this page will be helpful to others.
In total the Thule 916XTR T2 Bike Rack took me about 3 hours to assemble. While a good portion of the time was spent taking photographs the process took longer than I had expected given how few parts are actually involved. There were issues along the way slowed the process down. I will discuss these as we go further down. In reality armed with the Thule 916XTR T2 Bike Rack Assembly Instructions provided by Thule and this page you can easily complete the project in 30 minutes to an hour.
Thule 916XTR T2 Bike Rack Assembly Instruction Guide – Step 1
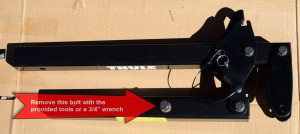
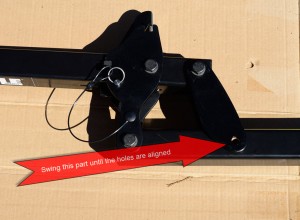
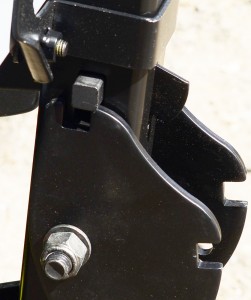
- Use either the included wrenches or a 3/4″ wrench and socket wrench to remove the bolt pictures below. See picture 1.
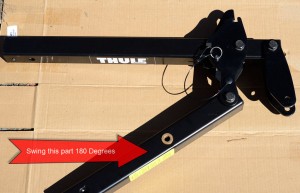
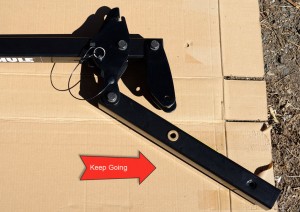
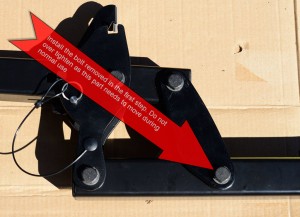
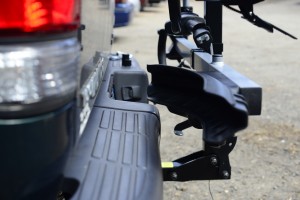
- Rotate or swing the tube in a 108 degree arc until the whole created from the previous step aligns with the two brackets. See pictures 2-4.
- Place bolt through the three pieces and tighten. Do not over tighten as this piece needs to rotate during normal operation.
Thule 916XTR T2 Bike Rack Assembly Instructions – Step 2
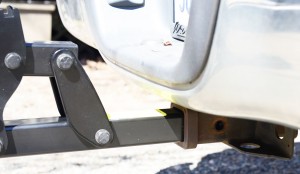
- Insert hitch and backbone assembly into hitch receiver and align the holes. See picture 2.
- Apply some grease to the hitch lock pin. See picture 1.
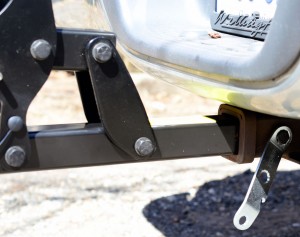
- Insert and tighten the hitch lock pin into the receiver and hitch backbone assembly. See Picture 3. I suggest using the included wrench to avoid over tightening the hitch lock pin.
Thule 916XTR T2 Bike Rack Assembly Instruction Guide – Step 3
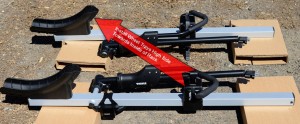
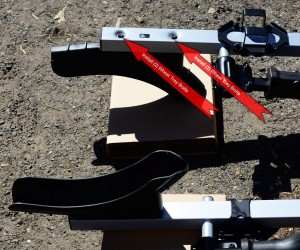
- Install wheel trays with (2) 5/16″ x 1″ slotted cutting bolts in the spar tubes. Make certain the high side of the wheel trays are towards the inside of the rack. Do not over tighten.
Thule 916XTR T2 Bike Rack Assembly Instruction Guide – Step 4
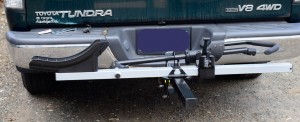
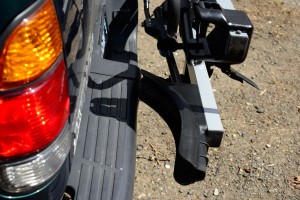
The 4th step in the Thule instructions can cause you some extra work and in fact was my reason for creating this page. Thule has you assemble the entire rack to completion before testing the fit on your vehicle. What can happen is depending on the location and orientation of your hitch receiver you may not be able to place the Thule 916XTR T2 Bike Rack in the upright position. In my case the wheel trays were hitting the bumper. A quick search on the internet told me this is a pretty common problem. I suggest reading the “Step 4 Alternate” a few paragraphs below so you can plan ahead and not have to rework the bike rack. Nobody likes doing things twice.
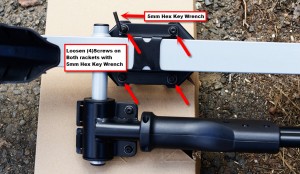
- Loosen all 4 bracket bolts with 5mm hex wrench as noted in the image below. Repeat this for both brackets.
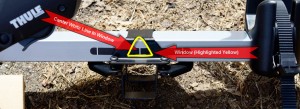
- On the backbone center white line of decal in the center of the window on the bracket loosened in the previous step. In the image below the window is highlighted in yellow.
- Slide the first bike tray oriented with the front wheel cradle on the driver’s side of the vehicle onto the backbone of the rack. Keep the bracket properly centered on the backbone from the previous step.
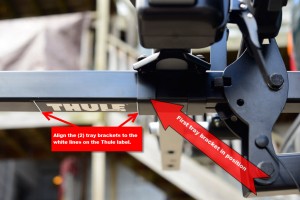
- Align the bike tray with the while line on the Thule decal as seen below. Tighten the (4) bracket bolts.
- Repeat the step above with the second bike tray. This time orient the wheel tray to the passenger side of the vehicle and align the bracket to the white line in front of the “T” on the Thule decal. Tight the (4) bracket bolts
- Pull the grey handle to unlock the backbone to verify the Thule 916XTR T2 Bike Rack can go full upright and lock. If it does your just about done. If it does not because the wheel trays are hitting your vehicle read step 4 alternate below
Thule 916XTR T2 Bike Rack Assembly Instruction Guide – Step 4 Alternate
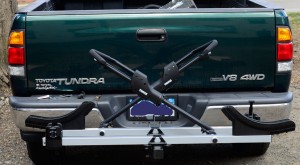
As I mentioned above the wheel trays of the Thule 916XTR T2 Bike Rack were hitting the bumper on my Toyota Tundra. The solution was the loosen the wheel tray brackets and slide them 4″ away from the vehicle. The final position relative to the white lines of the Thule decal are visible in the pictures below.
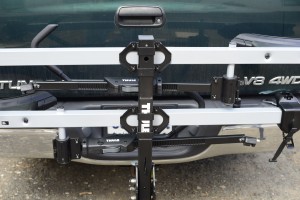
Thule 916XTR T2 with Bike Trays Adjusted to New Orientation. Note the White Lines of the Thule Decal
Thule 916XTR T2 Bike Rack Assembly Instruction Guide – Step 6
Honestly the remainder of the Thule provided 916XTR T2 Bike Rack Assembly Instructions are pretty good and do not need to be recreated. If you do not already have a copy you may download the Thule 916XTR T2 Bike Rack Assembly Instructions here

